 button.
The Create Campaign is used to add campaign header, schedule the flights, assign target channels and set media information for the campaign.
Click for help links for this topicClick for help links for this topic
Accessing the Create Campaign window
Prevent delivery during spots containing these values in their title (not case sensitive)
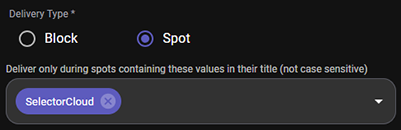
Delivery only during spots containing these values in their title (not case sensitive)
Create a Campaign process described
See also: Navigation bar, Navigation Pane, Edit Campaign and Duplicate Campaign
Select the Campaigns option from the Navigation pane. Then click the Add Campaign button.
Click any area for help.

Click any area for help.
The Campaign Header tab is where the Advertiser Name, Campaign Name, Time Zone, and Priority are information is defined.
The Advertiser field is used to add the Name of the Advertiser for the Campaign. This field can have up to 256 characters so it can be a short name or a descriptive name. This is a required field for the Campaign.
The Campaign Name field is used to add a Name for the Campaign. This field can have up to 256 characters so it can be a short name or a descriptive name. This Campaign Name is shown in details of the Station AudioDisplay window. This is a required field for the Campaign.
The Time Zone drop-down can be used to select a specific time zone or the time zone of the station(s) that will run the Campaign. A specific time zone would be selected in instances of a Live Event where the Campaign will run on different stations in various time zones, but the campaign needs to run at a specific time of a specific time zone to coincide with the Live Event. If the Campaign is to run during a morning show that airs from 5:00am to 9:00am on all stations running the Campaign, the 'Use Station Time Zones' would be selected so each station runs it at 5:00am based on their time. Once the campaign starts, the time zone cannot be changed.
Campaigns can be delivered in one of two ways: across the entire spot block or only during specific spots. The Delivery Type determines which behavior applies. A campaign can be either Block or Spot, but never both.
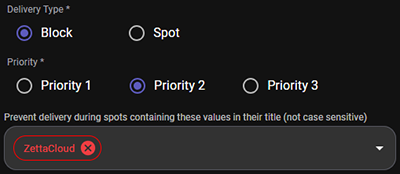
Campaigns by default are delivered during the entire spot block. The Delivery Type is used to select how the campaign is delivered, for the entire Block or just during the Spot.
Block - Block campaigns use the Priority setting to determine which campaign is shown. If a clash string is defined in the Prevent delivery during spots containing these values in their title (not case sensitive) field, AudioDisplay will suppress the campaign whenever a spot title contains that string. Block campaigns may optionally use takeover flights.
Spot - A spot campaign always delivers for the duration of the matched spot, overriding any block campaigns. When Spot is selected AudioDisplay will look for the match string in the Delivery only during spots containing these values in their title (not case sensitive) field. At least one match string must be defined. When a spot title contains a match string (case-insensitive), the campaign is delivered for the duration of that spot. Spot campaigns do not use priority levels.
Example scenario:
If:
Then:
In this case, the Block campaign’s clash logic never triggers because the Spot campaign already overrides it.
Important Spot vs Block Booking Rules
Allowed
Not allowed
The Priority field is displayed when the Delivery Type is Block. There are three priority settings, the default is Priority 2. Block Campaigns are delivered in order of Priority, so priority one is first, then priority two and finally priority three. If a station plays an ad break and AudioDisplay has multiple campaigns for that station, it will deliver the campaign with the highest priority. If a priority one campaign overlaps campaigns of priority two or three, the lower priority campaigns will NOT be displayed.
This field is used to create/select matching or clashing string values. The Delivery Type determines which behavior applies.
Prevent delivery during spots containing these values in their title (not case sensitive)
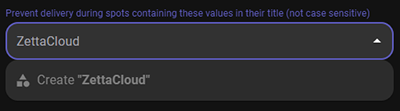
 option to create the new clash value. A Create Clash panel will open.
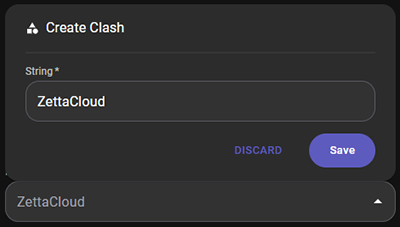
Delivery only during spots containing these values in their title (not case sensitive)
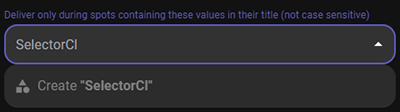 option to create the new match value. A Create Match panel will open.
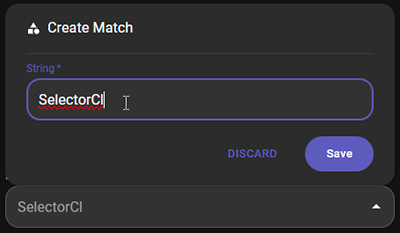
The Discard button is available at any step through the process of a New, Edit or Duplicate Campaign. To discard the changes, click the Discard button in the top right corner of the page. A prompt is shown allowing the campaign to be discarded. Click YES to discard any changes or NO to close the window and return to the underlying Campaign.

After the Header, Flights, Target Channels and Media is configured, click the Save button to Save the Campaign. A prompt is shown allowing the campaign to be saved. Click YES to save the Campaign or NO to close the window and return to the underlying Campaign.

 |
The following steps can be used to Create a Campaign: |
 button to open the Create Campaign window. or select a clashing value by typing in the field.
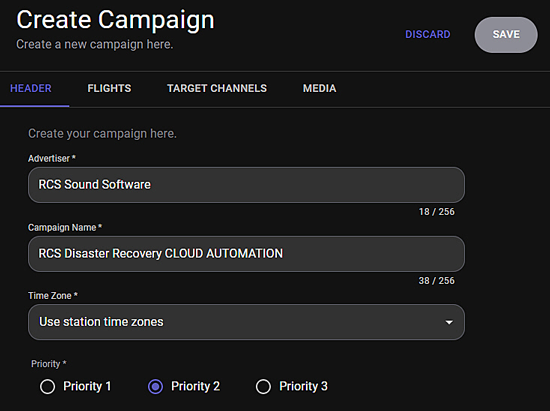 or select a matching value by typing in the field.
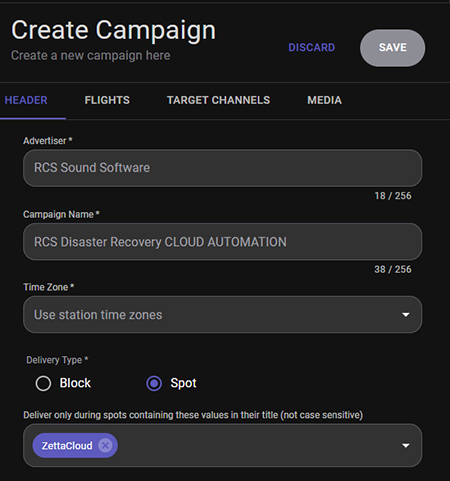

 in the Start field to select a start date and time.
 in the End field to select an end date and time.
 button to add the defined flight. Repeat the process of setting the Start and End Date and Time for each additional flight.
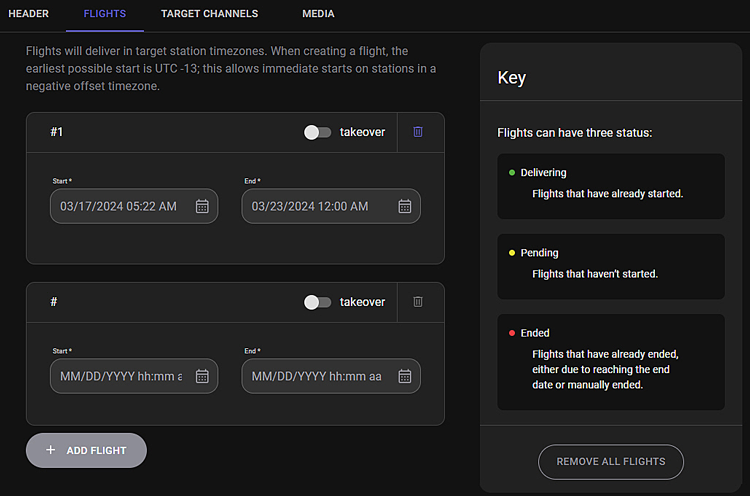
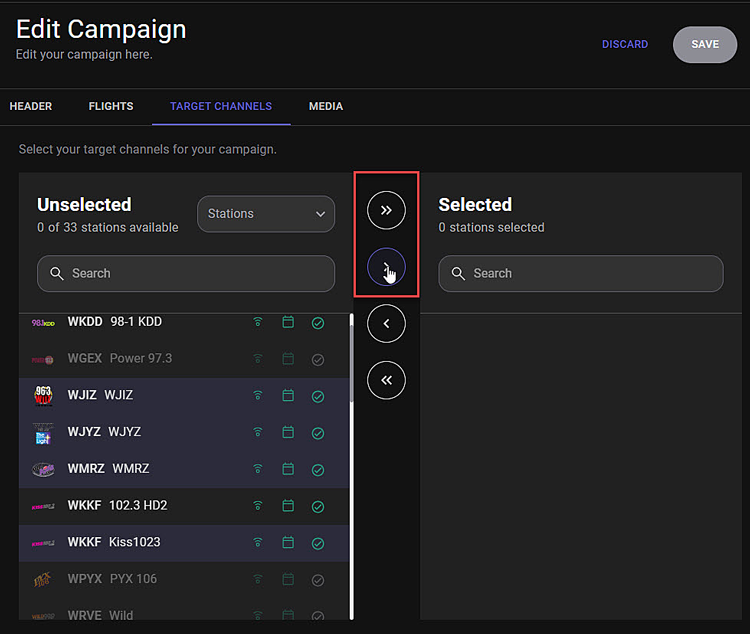
 button to move the selected to the Selected pane.
 button to remove a selected station from the Selected pane. See the Target Channels topic for more details.
 .
.© Copyright 2022 - 2026 AudioDisplay. All Rights Reserved.